No edit summary |
|||
| Line 184: | Line 184: | ||
*[http://www.robsacc.nl/ottens/forgottentrek_conceptart-sovereign.html Designing the ''Sovereign''-class starship] at Forgotten Trek, [http://www.robsacc.nl/ottens/ OTTENS] |
*[http://www.robsacc.nl/ottens/forgottentrek_conceptart-sovereign.html Designing the ''Sovereign''-class starship] at Forgotten Trek, [http://www.robsacc.nl/ottens/ OTTENS] |
||
*[http://www.lcarscom.net/fsd/art/1701-e.html Designing the ''Enterprise''-E] at [http://www.starshipdatalink.net/ Federation Starship Datalink] |
*[http://www.lcarscom.net/fsd/art/1701-e.html Designing the ''Enterprise''-E] at [http://www.starshipdatalink.net/ Federation Starship Datalink] |
||
| − | *[http://www.cygnus-x1.net/links/lcars/sovereign-class-starship-ncc-1701-e.php Fan-made Sovereign Class Blueprints |
+ | *[http://www.cygnus-x1.net/links/lcars/sovereign-class-starship-ncc-1701-e.php Fan-made Sovereign Class Blueprints] |
{{featured}} |
{{featured}} |
||
Revision as of 23:03, 2 June 2006
| Sovereign-class | |
| File:Sovereign class at warp.jpg | |
| Type: | Heavy cruiser, Explorer |
| Length: | 685 meters |
| Beam: | 240 meters |
| Height: | 88 meters |
| Decks: | 24 |
| Mass: | 3,205,000 metric tons |
| Crew: | 700-800 |
| Maximum Cruising Speed: | Warp 9.975+ |
| Armament: | 16 Type XII (Refitted, 12 Basic) phaser arrays, 9 Torpedo launchers (7 photon torpedo, 2 quantum torpedo) |
| Defenses: | Deflector shields |
General overview
The Sovereign-class starship was introduced in the late 24th century, showcasing some of Starfleet's most recent technological advances. The Sovereign Project was one of the new defensive technologies initially intended for use against the Borg threat. The prototype USS Sovereign was still in the design phase during the Battle of Wolf 359.
Heavily armed, the design philosophy for the Sovereign-class was shaped by the discovery of the Borg. The Sovereign Project attempted to push the envelope as far as possible when it came to computer power, shields, armament, and systems capabilities. The Sovereign-class starship combined the creature comforts associated with the larger Galaxy-class vessels with the tactical power of the new Prometheus-class. (Star Trek: First Contact)
The vessel included some of Starfleet's most advanced technologies. Primary among these was a large quantum torpedo launcher mounted forward of the deflector dish above the captain's yacht, which was capable of firing at least four rounds per second. Back up to the quantum torpedoes was provided by photon tubes; four of these were located at the base of the engineering section in pairs which faced forward and aft. These launchers could fire up to twelve torpedoes at a time. The warp engines of the Sovereign were of a new design which eliminated subspace distortion effects inherent to standard warp drives without the use of variable geometry nacelles (as found on the Intrepid-class – see also Hekaras Corridor). (Star Trek: Nemesis)
Class history
The Enterprise firing at the Borg Cube at the Battle of Sector 001
The Enterprise under Son'a fire in the Briar Patch
The Enterprise and the Scimitar face off at the Battle of the Bassen Rift
The Enterprise in drydock over Earth in 2379
In 2372, the Sovereign-class USS Enterprise-E was launched from drydock. At least one other, the class prototype USS Sovereign, is in service.
One of the Sovereign-class' first major engagements came in 2373, when the USS Enterprise saw action in the Borg incursion into Sector 001, and was instrumental in the destruction of the attacking cube. (Star Trek: First Contact)
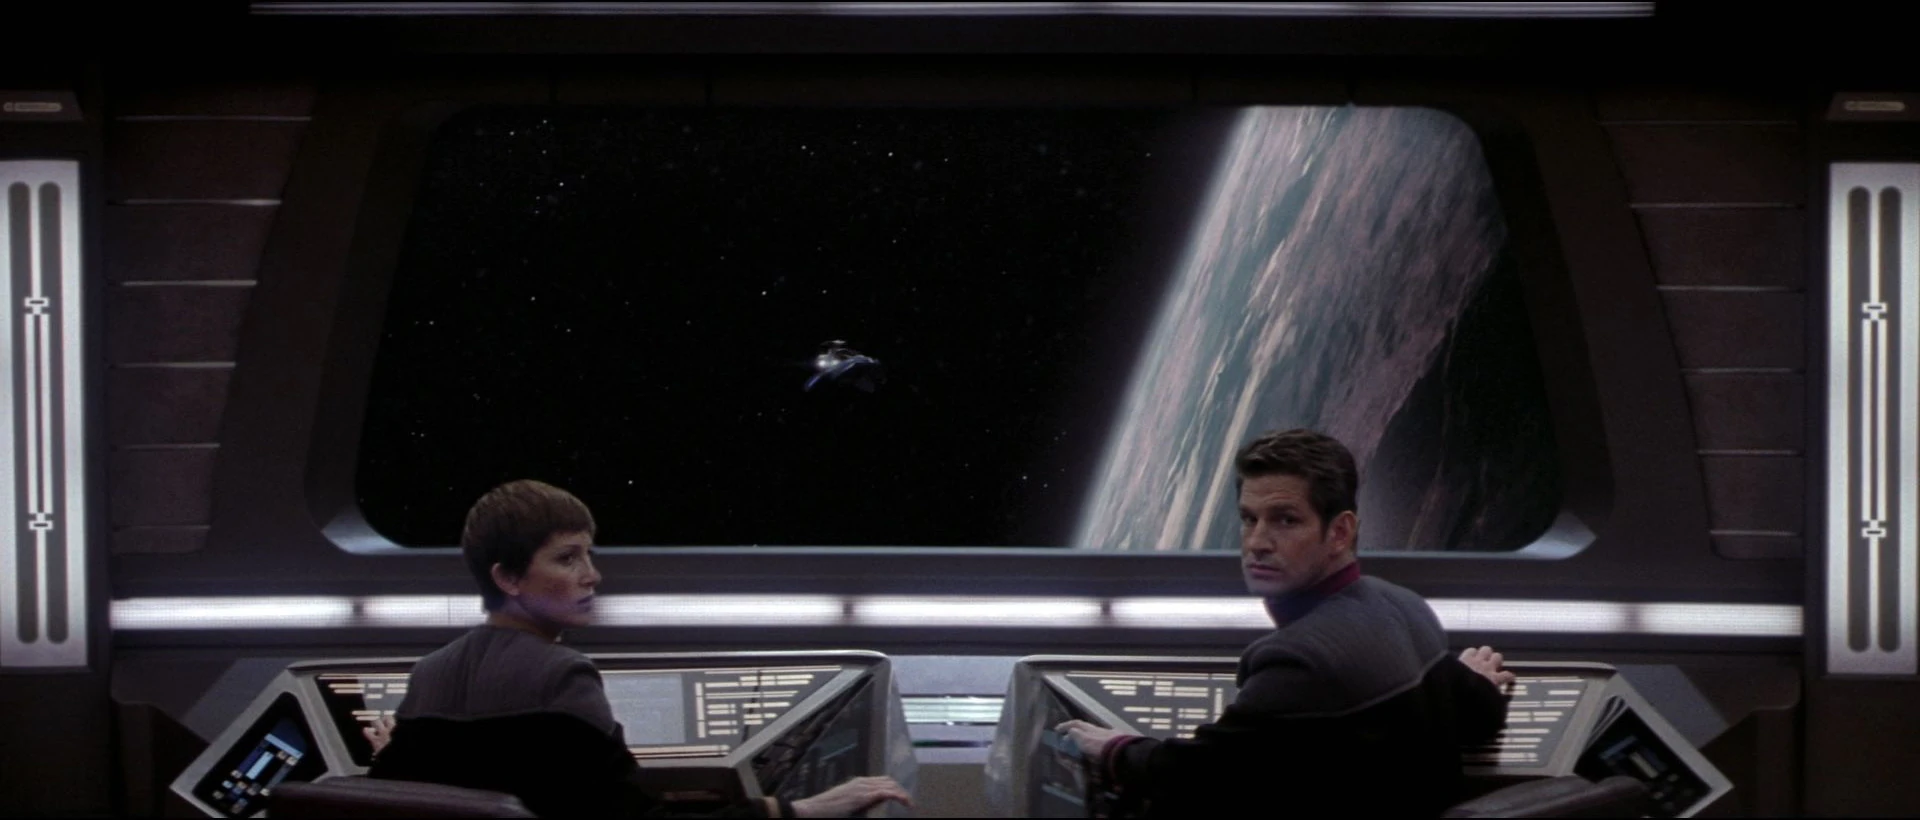
In 2375, the crew of the Enterprise became embroiled in a plot by the Son'a, assisted by Starfleet Admiral Matthew Dougherty, to forcibly remove the Ba'ku from their isolated homeworld in the Briar Patch. The Son'a planned to harvest metaphasic radiation from the planet's ring system, and needed Starfleet cooperation to carry out the plan. Captain Jean-Luc Picard felt the relocation of the Ba'ku was a severe violation of the Prime Directive, and led a team of Enterprise crewmembers to the Ba'ku planet to prevent their capture and removal.
Commander William Riker was instructed to take the Enterprise and contact the Federation Council to alert them to the realities of the situation. It was a treacherous journey, since the Briar Patch interfered with external communications as well as the ship's impulse drive. Two Son'a battle cruisers were sent by Ahdar Ru'afo to intercept the Enterprise before it left the Briar Patch, and severely damaged the ship in the process. The warp core was ejected in order to seal a dangerous tear in subspace created by the isolytic weaponry of the Son'a. Riker was able to outsmart the Son'a by collecting metreon gas native to the Briar Patch, then venting it behind the ship. When the Son'a used their weapons, the gas exploded, destroying one ship and severely damaging the other. The Enterprise then convinced the Federation Council to reconsider the plan for the Ba'ku. (Star Trek: Insurrection)
Shortly after the resolution of the Dominion War, a refitting of the Sovereign-class took place. The changes included three extra aft-facing torpedo tubes, along with one more forward-facing tube, a twin launcher aft of the bridge, and single launchers above the aft hangar deck and at the base of the forward bridge terracing. Additionally, four extra phaser arrays were added to the nacelle pylons to cover an existing blind spot. The Enterprise was able to deploy these new systems in 2379 when it faced the Reman Scimitar in the Bassen Rift.
In the ensuing confrontation, the Enterprise was severely damaged, including a major hull breach on the bridge, and unable to stop the Scimitar. As a last resort, Picard ordered the Enterprise to ram the Scimitar, causing the destruction of much of the saucer section's forward area. The collision disabled the Scimitar, but Shinzon, driven by vengeance, activated his deadly thalaron weapon and trained it on the Enterprise. The weapon was later overloaded and the Scimitar was destroyed due to interference from Commander Data, who sacrificed himself to save the Enterprise. The ship then returned to Earth, and was required to go through several weeks of extensive drydock repair. (Star Trek: Nemesis)
Technical Data
The Sovereign-class had two hull sections: a saucer-shaped primary hull and a secondary hull which mounted the two warp nacelles (design sketches indicate the hulls were capable of saucer separation but such was never seen on screen). In terms of deck layout, the upper sections of the Sovereign-class starship formed the command section and living areas, while the lower decks housed main engineering and fuel supplies.
The Sovereign-class starship was 685 meters long, and packed a huge amount of equipment, systems, and materials into its 24 decks. As is traditional, deck numbering descended from top to bottom. At the top of the saucer section was Deck 1, which housed the main bridge. This deck also held the more recent modifications of an observation lounge, a ready room for the ship's captain, and an airlock with attached cabin. Deck 2 encompassed the first of the many levels of crew quarters, with rooms for the highest-ranking command staff and an officer's mess hall. Decks 3 through 9 featured more officers' quarters, the forward and aft viewing lounges, science labs, the main shuttlebay, conduits for the optical data network, and the vessel's main computer core.
Decks 10 through 14 completed the primary hull of the Sovereign-class starship, and also encompassed forward and aft cargo bays on Decks 10 and 11, and phaser systems on Deck 11. Sensors and the secondary navigational deflector were found on Deck 12. Deck 14 was largely dedicated to engineering systems, and also featured the lower sensor platform. Decks 15 through 18 comprised the main navigational deflector array and an auxiliary bridge, which was also known as the battle bridge.
Deck 13, which was taken up almost entirely by deuterium fuel tanks, marked the real split between the habitable areas and the engineering and ship's storage sections. Main engineering and its related systems – such as the EPS power tabs, the central matter/antimatter reaction chamber, support labs, and the engineering computer core – were spread over Decks 14 through 18. Deck 16 also featured the launch and retrieval mechanism for the captain's yacht. The yacht was lowered by a set of gantries until its engines extended to operational position and then it would be free to maneuver clear of the Sovereign-class vessel.
Moving down to the lowest levels of the ship, Decks 19 and 20 contained the launch and loader mechanisms for the ship's complement of quantum torpedoes and unmanned probes, while Deck 21 housed the fore and aft tractor beam emitters. The antimatter reactant generator and storage pods were housed on Decks 23 and 24, along with the lateral phaser array.
.jpg)
Master Systems Display of a Sovereign-class starship
Command and control systems
The computer system onboard the Sovereign-class were bio-neural gel pack based. Computer systems were concentrated in two computer cores. The primary core was located directly below the main bridge on Decks 6 through 8. The secondary core was located in the engineer section, adjacent to environmental control, on Decks 15 through 17.
Primary operational control of the Sovereign-class was provided by the main bridge, located at the top of the primary hull. The bridge directly supervised all primary mission operations and coordinated all departmental activities. The bridge was an ejectable module, allowing for a wider variety in mission parameters as well as an emergency escape route.

Main bridge of a Sovereign-class starship
The Conn and Ops stations in front of the viewscreen
The Observation Lounge
The central area of the main bridge provided seating and information displays for the captain and two other officers. The captain's chair was raised from the rest of the bridge officers to the height of the surrounding level, which included tactical and operations. The two officer seats were equipped with fully programmable consoles for a variety of uses. Directly fore of the command area was the conn officer, who faced the main viewer. To the port side of the conn officer, also facing the main viewscreen, was the operations manager's console, which was identical in size and design to the helm station. At the very front of the bridge chamber was a large viewscreen. When the screen was not active, a standard bulkhead was present.
Aft and to the left of the command area was an elevated platform on which tactical and security consoles were located. To the captain's right, behind the tactical console, was the mission operations section of the bridge. Against the starboard side walls of the main bridge were the consoles for sciences, along with others that were programmable for a multitude of functions.
Located against the aft wall of the bridge was a large master systems display monitor, similar to the one in engineering. All relevant ship information (such as damage, power distribution, etc.) could be displayed on this cutaway image of the vessel. This monitor could be used to direct ship operations and could be configured for limited flight control if necessary. Also located against the aft wall of the main bridge was the large engineering console. This had a smaller cutaway diagram of the vessel, which displayed all engineering-relevant data and showed warp fields and engine output.
There were two turbolifts on the bridge that could handle normal transit around the Sovereign-class starship. There was also an emergency ladder that connected the bridge to lower decks. Additionally, the bridge provided direct access to the observation lounge, which was located directly aft of the bridge, and the captain's ready room. (Star Trek: First Contact)
Captain's Ready Room
The captain's ready room on the Sovereign-class starship doubled as an office and a second private cabin in addition to the commanding officer's private quarters. It was located off the starboard side of the main bridge on Deck 1, and provided a place where the captain could work or rest while remaining next to the bridge in case of an emergency. Meetings between the captain and one or two people would also take place here.
The main area of the ready room was essentially a studio apartment. In one corner there was a simple, narrow bed with a small bookcase over it. Toward the rear of the room was a desk with a communicator console. In a corner behind the desk was a doorway which led into a bathroom containing a sonic shower. Below a mirror was a sink that had no visible controls; the water came on automatically when hands were placed benath the faucet, and went off when they were withdrawn. Usually, the ready room would be decorated by its occupant by adding a number of personal ornaments.
Propulsion systems
Sovereign-class starships achieved warp flight through two warp nacelles, which housed multiple pairs of warp coils. Maximum speed was warp 9.99, which could be maintained for a limited number of hours. (Star Trek: First Contact)
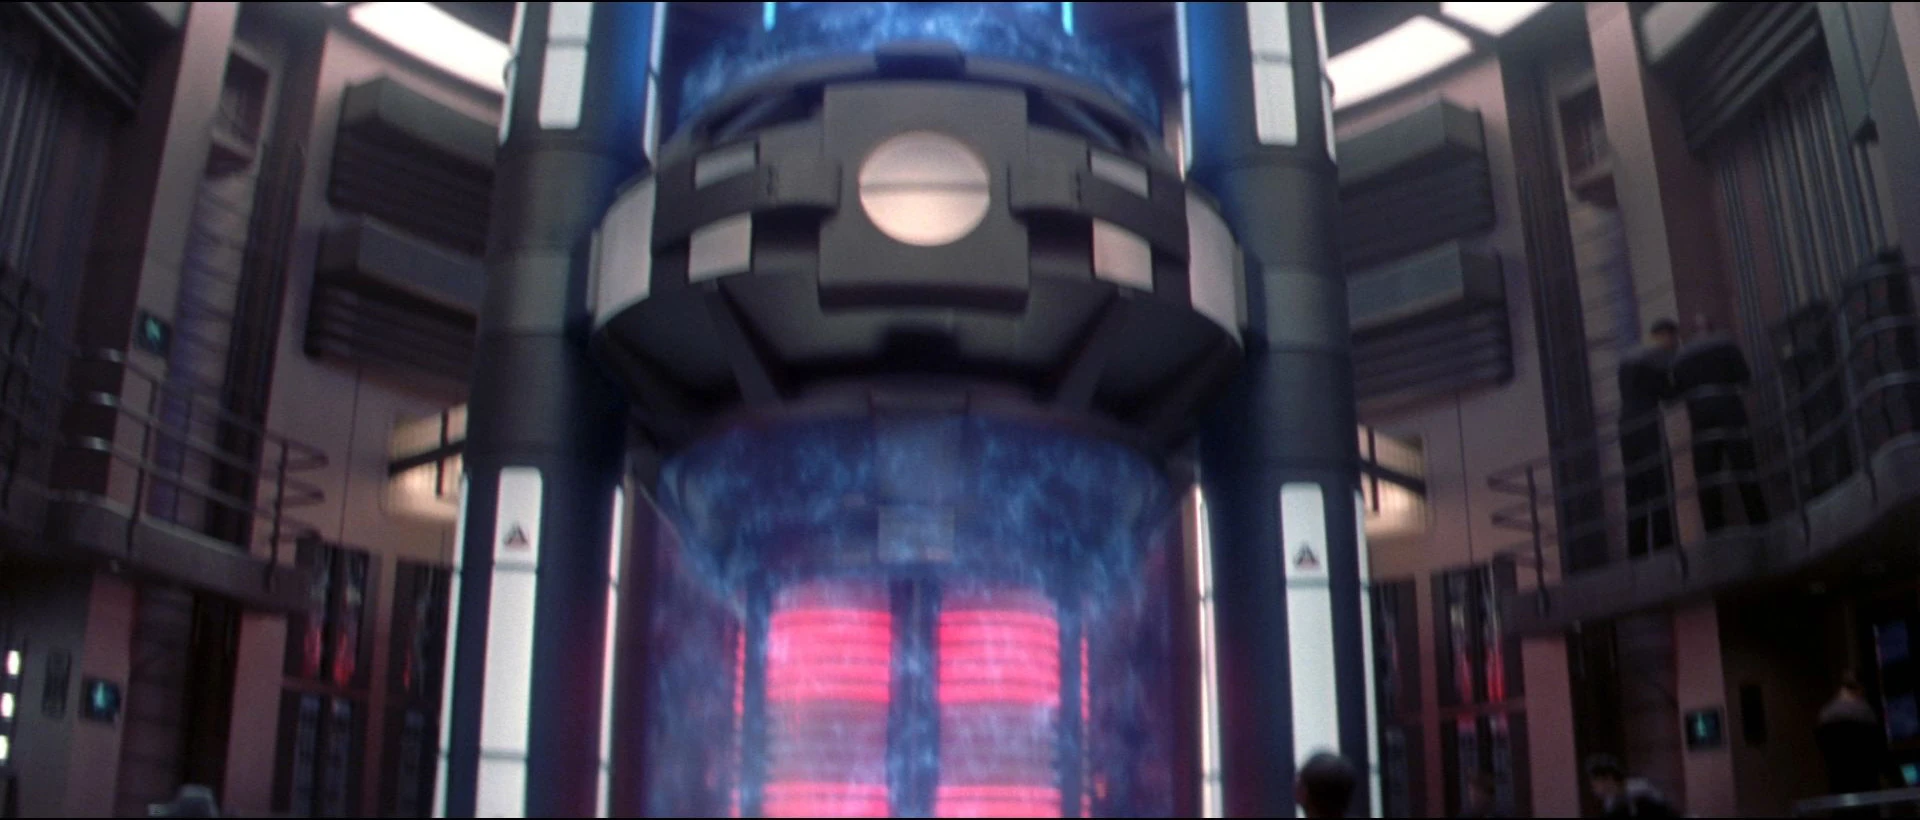
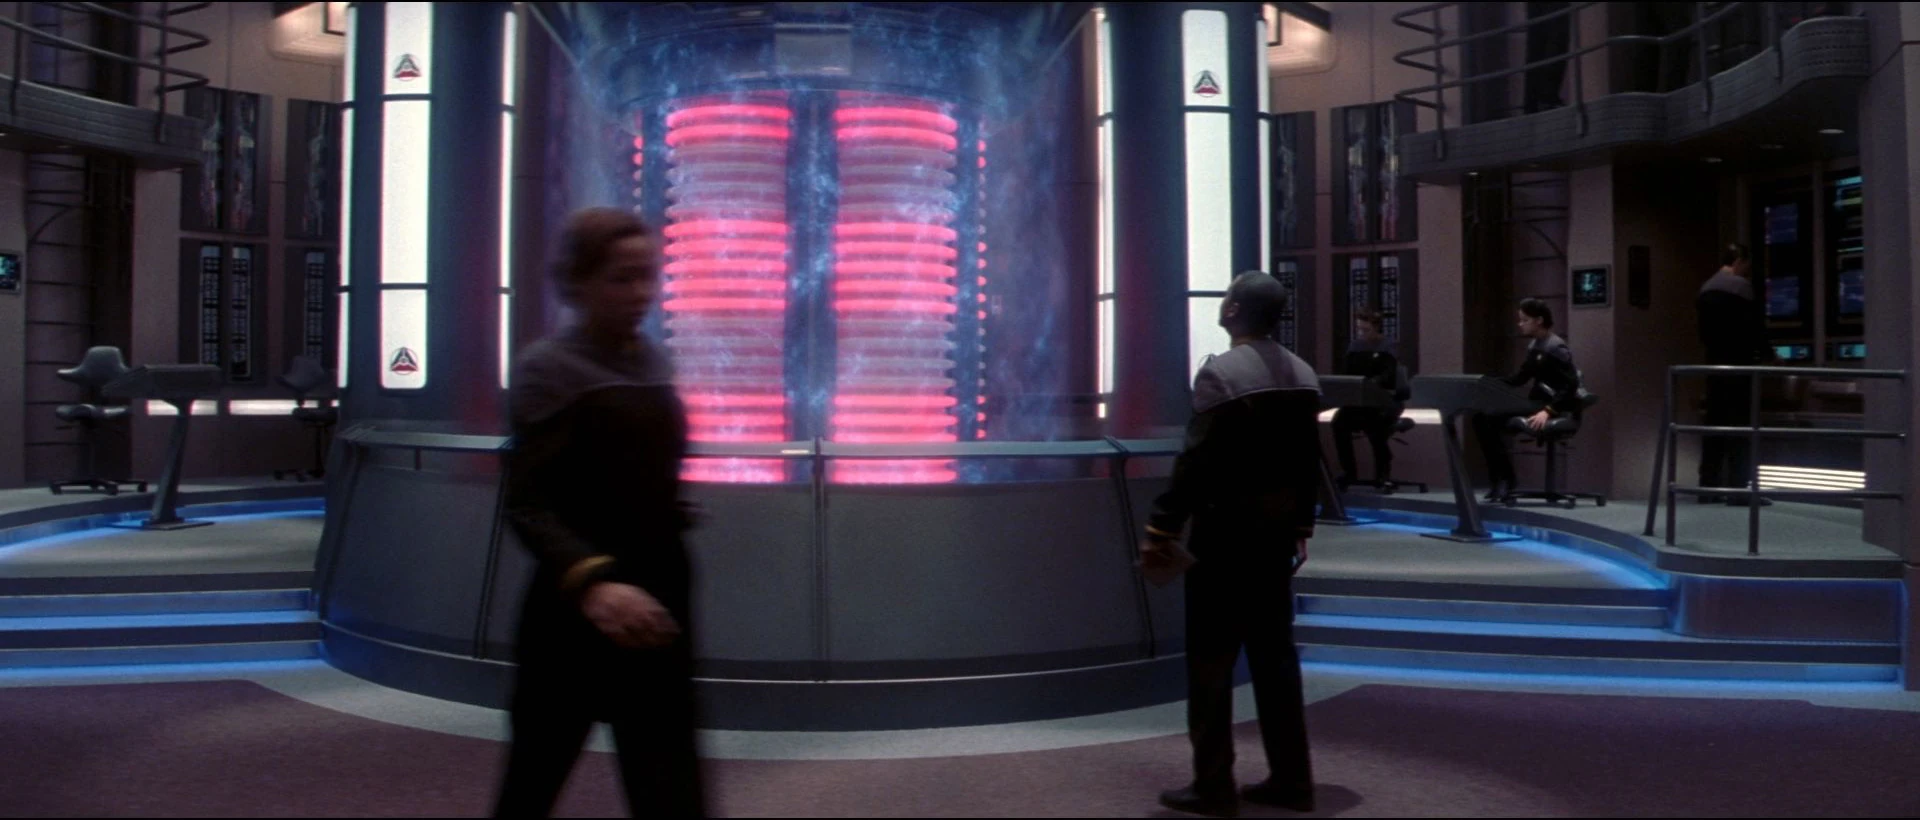
The warp core spanned several decks in the engineering hull. The deuterium tanks were above the core, while antimatter storage pods surrounded the base of the core. There were two impulse engines, both located at the aft of the saucer section. The engineering facility operated over three levels, although the majority of controls were situated on the main deck (Deck 16) and an upper level gantry. Entrance to the primary engineering spaces was provided by two large blast doors, a pair each deck on Decks 15 and 16, that could be closed for internal or external security reasons, as well as in case of emergencies. (Star Trek: Insurrection)
Main engineering contained the controls for the warp and impulse drive systems. It was much larger than on previous starship classes and was split into three levels. The warp drive was fitted with the latest advanced in warp field design so that it avoided the damage to the fabric of space caused by previous models. The matter/anti-matter reaction assembly, which filed the majority of the main engineering area, ran vertically over a number of decks. The lower warp coils glowed red, while the upper set, above the reaction control chamber, glowed blue.
The Sovereign's warp core

The main engineering facility
Two large circular pillars were positioned next to the warp core and contained highly dangerous plasma coolant, which under normal operating conditions glowed white. Two rectangular power transfer conduits fed off from the warp reaction chamber and angle out of main engineering to the port and starboard warp nacelles.
Arranged around the warp core stack were a number of control consoles that could be reconfigured to emulate all the command controls on the bridge. The largest work station was the master systems display, which was used to monitor the status of all key systems and could comfortably accommodate four personnel. There were also various wall displays, including a schematic that showed the 'health' of the warp propulsion system. Additionally, there were numerous ladders and access panels to Jefferies tubes, leading throughout the starship. A second tier ringed the second level of main engineering on Deck 15. Two ladders on the opposite ends of the catwalk provided access. (Star Trek: First Contact) By 2379, Starfleet began addressing a long standing defensive oversight by implementing a force field system around the warp reactor. (Star Trek: Nemesis)
It is unknown at this time exactly what role the reactor core force field played in protecting the ship. During its only shown use, the force field was disabled in battle mere minutes after it was activated. How this helps the ship is a mystery due to the lack of a force field around the reaction chamber. (However, this could possibly be to protect it when the engineering crew fights intruders.) A similar tactic was employed in VOY: "Day of Honor" by B'Elanna Torres when she had a Level 10 force field surround Voyager's main engineering right before she ejected the warp core. It may also help contain a warp core breach and stop, or slow it, from spreading.
Tactical systems
Firing phasers from the saucer section


Firing a torpedo from an engineering hull launcher.
Firing a torpedo from the bottom saucer section launcher
Deflector shields on display
The Sovereign-class starship had several weaponry enhancements over previous starship classes, including quantum torpedoes as well as photon torpedoes, more powerful phasers, and faster computer processing capabilities.
The Sovereign-class employed fourteen Type-XII phaser arrays at key locations throughout the ship's hull. Five dorsal phaser arrays were located on the primary hull, one extending around the saucer section, giving it an oval appearance. Four more arrays, roughly a quarter of the size of the original, covered the aft dorsal firing arcs and were located along the aft portion of the saucer section. Four ventral phaser arrays were located on the primary hull, extending around in nearly a half circle on both the starboard and port ventral sides of the saucer section. A single phaser array was located along the ventral section of the engineering hull, running perpendicular to the hull.
Four traditional fixed-focus second generation torpedo launchers were located within the engineering hull, with the fore and aft covered by two launchers each. The forward launchers were located beneath the navigational deflector. Each launcher was capable of loading five torpedoes in one salvo, typically launching them in an alternating interval to reduce the chance of collision in flight. The aft launchers, located on the underside of the hull, were slightly smaller assemblies, capable of loading only one torpedo at a time each. The Sovereign-class was normally outfitted with both photon and quantum torpedoes. (Star Trek: First Contact)
A custom assembly for the Sovereign-class was a second-generation automated launcher located on the underside of the saucer section, capable of preloading six torpedoes for rapid fire. In addition, the aft launcher was located on the upperside of the back of the saucer section. (Star Trek: Nemesis)
Also in drawings done by Rick Okuda, the Sovereign-class flagship USS Enterprise-E can separate into two parts just like the Galaxy-class starships. If you listen very carefully you hear Captain Picard in Star Trek: Nemesis go over the option of leaving the saucer section of the ship in the Bassan Rift. Also, the saucer section has it's own warp drive and two photon and quantum torpedo launchers, one facing fore and one facing aft. The saucer section has a compliment of about 50 photon and 50 quantum torpedoes. Rick wanted to have the new Enterprise-E to have some of the same qualities as the prior Galaxy-class ship.
Deflector shields
Deflector shields serve as defense against enemy fire, hazardous radiation, and micro-meteoroid particles. The Sovereign-class starship's shields, when raised, stayed extremely close to the hull to conserve energy, the average range of which was approximately ten meters away from the hull. This could be extended at great energy expenditure, theoretically even to envelope another starship or object within close distance of the vessel. (Star Trek: Nemesis)
The Sovereign-class shields seemed to have changed over time. In Star Trek: First Contact, when the Enterprise-E dispersed a hit from the Borg cubes' cutting beam, the shields appeared as the usual large blue 'bubble'. In Star Trek: Insurrection, when hit, the Enterprise-E's shields showed up as a smaller bubble, conforming more to the shape of the hull. Finally, in Star Trek: Nemesis, both the disruptor fire from the Scimitar and the debris from one of the Romulan Warbirds caused the Enterprise-E's shields to show a 'skin-tight' effect, more a wave rippling across the hull's surface than a bubble at all.
Escape pods
The Sovereign-class starship carried a number of escape pods known as Autonomous Survival and Recovery Vehicles, or ASRVs. In the event of a catastrophic emergency, these pods served the same purpose as the lifeboats of a water-based vessel and ensured the continued survival of passengers and crew after the primary vessel had to be abandoned.
The escape pods were located throughout the Sovereign-class starship's primary and secondary hulls: there were two rows of pods on the dorsal side of the command saucer, and two on the ventral side. Further rows of pods lined each side of the engineering hull. The ASRVs were basically the same shape as a triangular table with three legs. The bottom of the pod had a complex pattern of vents, access hatches, and thrusters. Marks identifying the pods as coming from the Sovereign-class vessel and a serial number that identified each individual escape pod were displayed on the top and bottom. Each side had warning lights and black-and-yellow zebra markings, helping to incrase their visibility and making them easy for rescuers to locate.
Personnel entered the pods through hatches that lined sections of the Sovereign-class starship's corridors, and a situation display monitor was located between the pods. Each hatch swung open on a hinge at the bottom, creating a short ramp from the floor of the corridor into the interior of the capsule. The ASRVs were designed to eject from the ship at a considerable rate so that they cleared any blast radius should the Sovereign-class starship explode. The pods produced an inertial dampening field to protect the occupants from accelerative forces, and the three thrusters located in each 'leg' provided independent maneuverability. Life support was maintined by an automatic environmental system that regulated the pressure, humidity, and temparature. The pods were also equipped with subspace communications to alert rescuers of their status and position, as well as being used to keep in contact with the other pods.
The ASRVs were capable of sutaining the occupants for a number of weeks, but if there were no starships in the vicinity that could rescue them the pods were capable of atmospheric entry and landing if a suitable planet could be found to set down on. (Star Trek: First Contact)
Crew support systems
Medical facilities

Sovereign-class sickbay
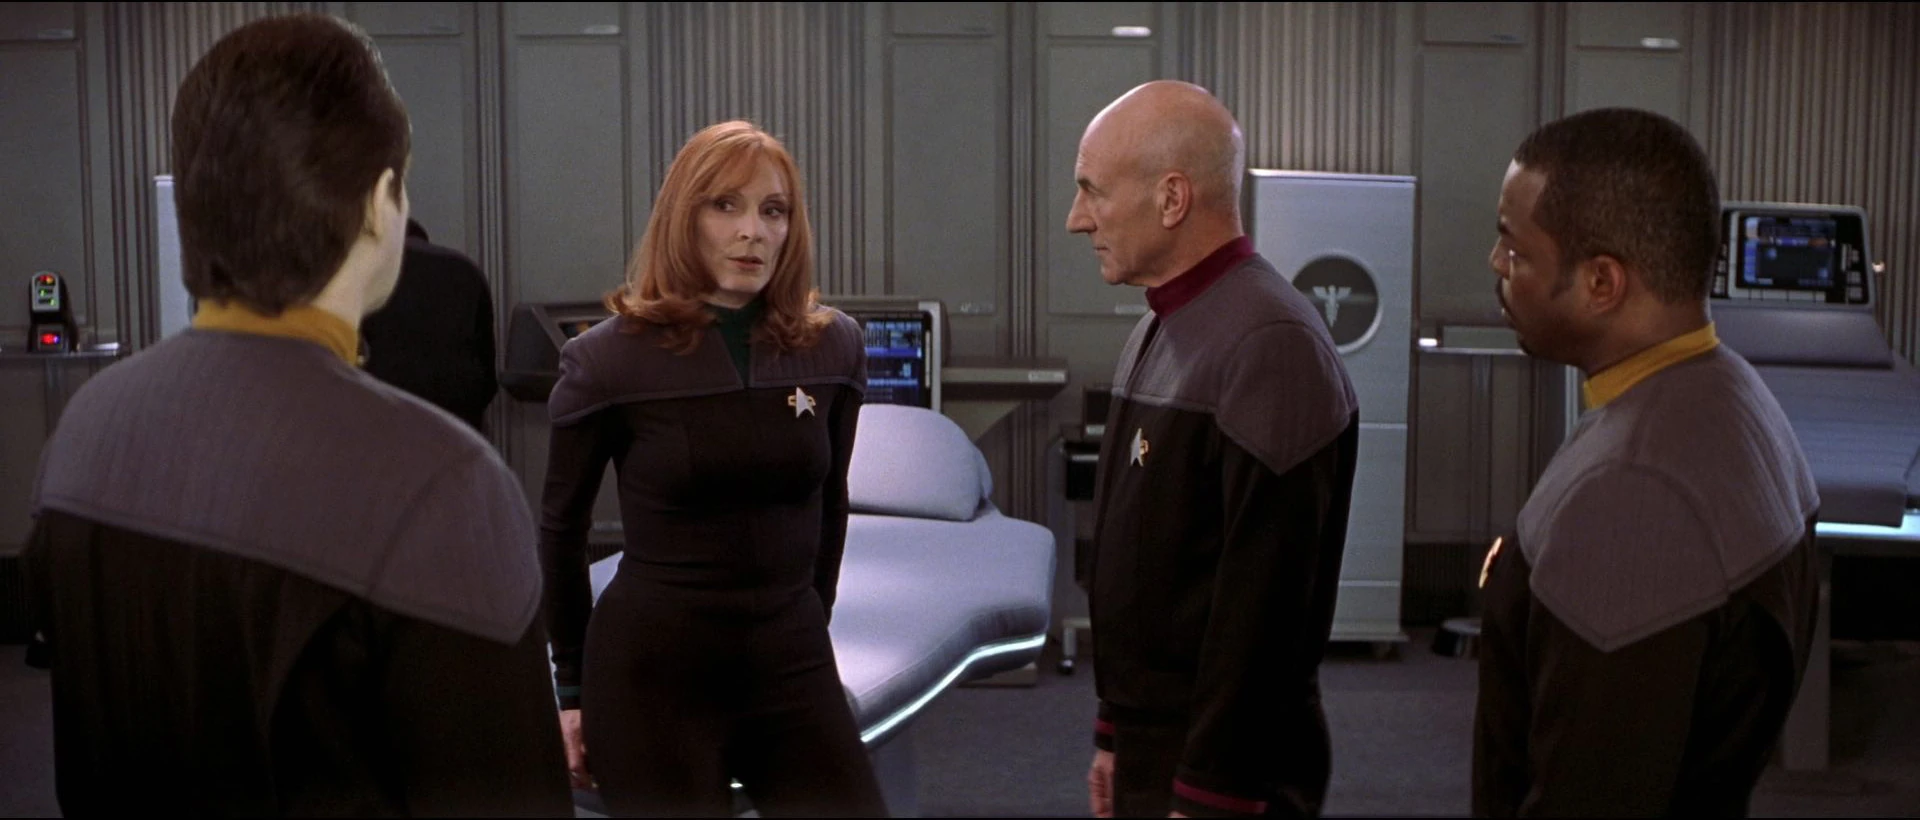
One large sickbay facility, located on Deck 7, served as the primary care facility on Sovereign-class starships. Equipped with six standard and one advanced biobed and an EMH (emergency medical hologram), sickbay was also home to the Chief Medical Officer's office and a small lab used for routine analysis of patients. The room itself was considered to be general-purpose, often the location of regular crew physicals, appointments, and various medical emergencies - it could effectively handle the majority of situations that a starship crew would face. (Star Trek: First Contact)
- While a different sickbay set was used for Nemesis than in the pervious films, we may simply assume that the larger set seen in the final film was the "main ward" mentioned in some technical manuals and schematics.
Located near sickbay was the counselor's office. A modest room approximately the size of a standard living room compartment, it could easily be placed somewhere within the residential areas of the ship at the counselor's discretion. While decorated to the tastes of the staff using it, the office tended to be equipped with comfortable seating and colors to better relax its visitors. (Star Trek: Insurrection)


Senior officers' quarters


Officers' quarters bedroom
Crew quarters
The arrangement of living quarters was designed to be modular, so that at any time a particular area could be reconfigured to create larger or smaller residential areas. Most living areas were located on the upper and lower surfaces of the saucer section, offering residents a remarkable view of the starscape outside their windows.
As is common on Starfleet vessels, the living accomodations for senior officers and VIPs were larger than standard crew quarters. Officers' quarters usually included a living area in the centre of the dwelling, which held a personal workstation, couch, replicator and a small dining area. Connected to this was a bedroom that featured a double-sized bed and room for personal belongings. Normally, the bedroom would be connected by a half-bathroom with wash basin, mirror, several drawers and a sonic shower. For senior staff officers, this bathroom was usually upgraded to a full-sized bathroom with bathtub. (Star Trek: Insurrection)
Auxilary spacecraft systems
Located at the dorsal stern of the primary hull, the main shuttlebay took up a significant portion of the aft section of Decks 6 through 9 on the Sovereign-class. Due to the mission profile of the Sovereign, the shuttlebay extended further than normal for a vessel its size to accommodate runabouts and several shuttlecraft.
The secondary shuttlebay was located at the very aft portion of the engineering hull, an homage to the Constitution-class shuttlebay. This bay, while smaller than the main facility, was just as capable of handling flight operations as the main shuttlebay. (Star Trek: First Contact)
In addition to shuttlecraft, the Sovereign class also featured a Captain's Yacht, designed for special diplomatic missions. The Yacht on board the Enterprise-E was named the Cousteau. (Star Trek: Insurrection)
Ships commissioned
- USS Enterprise (NCC-1701-E)
- USS Sovereign
Appendices
Appearances
Background information
The Sovereign-class starship was designed by production designer Herman Zimmerman with illustrator John Eaves. Rick Sternbach did the working construction drawings of the model, which was built at Industrial Light and Magic. Comments made by Rick Sternbach on the TrekBBS give the Sovereign-class a designation of Heavy Cruiser, a mass of 3,205,000 metric tons, an apparent crew complement of 855, and a maximum cruising speed of warp 9.9. He also stated that it was the intent that the Sovereign-class be the replacement for the Excelsior-class starship. These facts have yet to be confirmed in canon.
Apocrypha
- Sovereign-class starships have been mentioned often in novels and games. A role-playing game supplement from Decipher mentions the Sovereign, Yorktown and Independence.
- According to some production memos, the Enterprise-E was originally named the USS Monarch, but after the Enterprise-D was destroyed, the Monarch was renamed Enterprise in a similar fashion to the Enterprise-A, which was, according to Gene Roddenberry, supposed to have been renamed from the USS Yorktown.
External links
- Sovereign Changes - DITL's Graham Kennedy details the changes made to the Sovereign-class between Insurrection and Nemesis
- Designing the Sovereign-class starship at Forgotten Trek, OTTENS
- Designing the Enterprise-E at Federation Starship Datalink
- Fan-made Sovereign Class Blueprints
Revision ID missing! • Date missing! • Blurb